User Guide - CREATE LUTS For Adobe Lightroom
Get consistent colors between Color.io, Adobe Lightroom and Camera RAW

Managing color between different applications can be challenging, especially when dealing with wide gamut color spaces. This guide provides a clear, step-by-step process for a color-managed workflow between Color.io and Adobe Lightroom and Adobe Camera RAW, ensuring color accuracy and consistency for professional workflows.
Workflow Overview
- RAW Image Development in Adobe Lightroom or Camera RAW
- Export in Display P3
- Processing and Color Grading in Color.io
- Create XMP Profiles for Adobe Lightroom
1. Raw Development in Lightroom or Adobe Camera RAW
While both Color.io and Lightroom can be used to debayer RAW images, a single raw converter must be chosen as the starting point to get a consistent image between applications. For this workflow guide we'll do our initial RAW image processing in Lightroom and then use Color.io for film emulation and color grading.
- Open your RAW image in Lightroom or ACR
- Create a neutral base image with Adobe's tools. Don't add too much contrast or saturation or anything you want to do in Color.io later. Things you can do at this point are noise reduction, shadow and highlight recovery, white balance and lens correction. Try to avoid clipping or dialing in a strong look at this point.
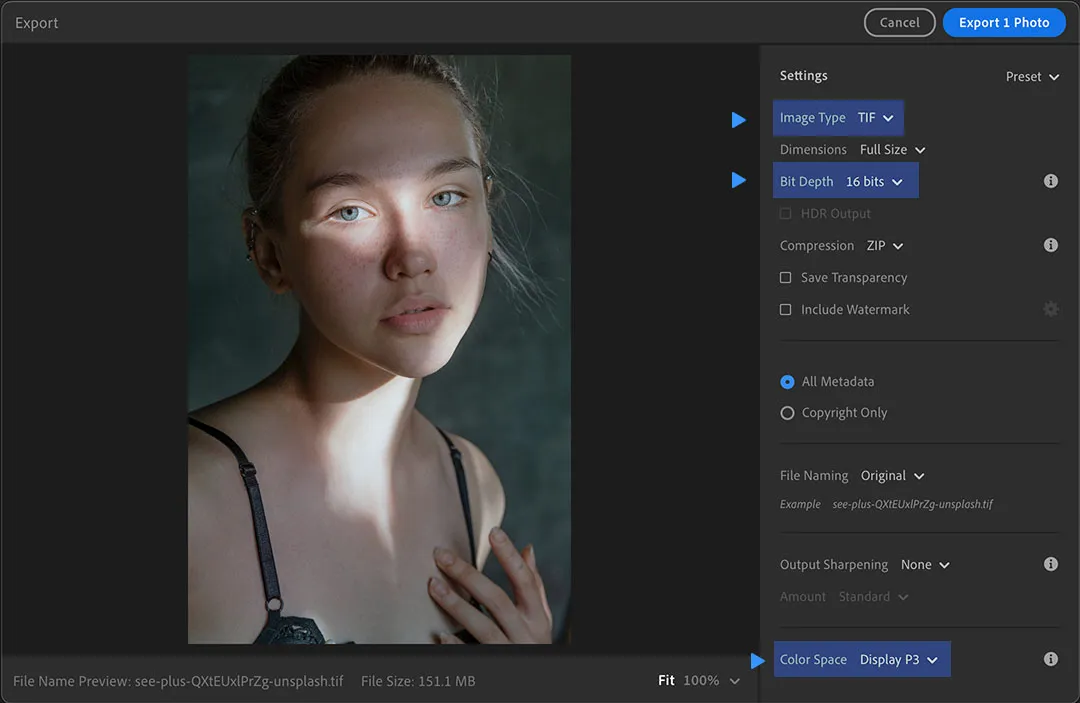
- Export and set the Color Space to Display P3.
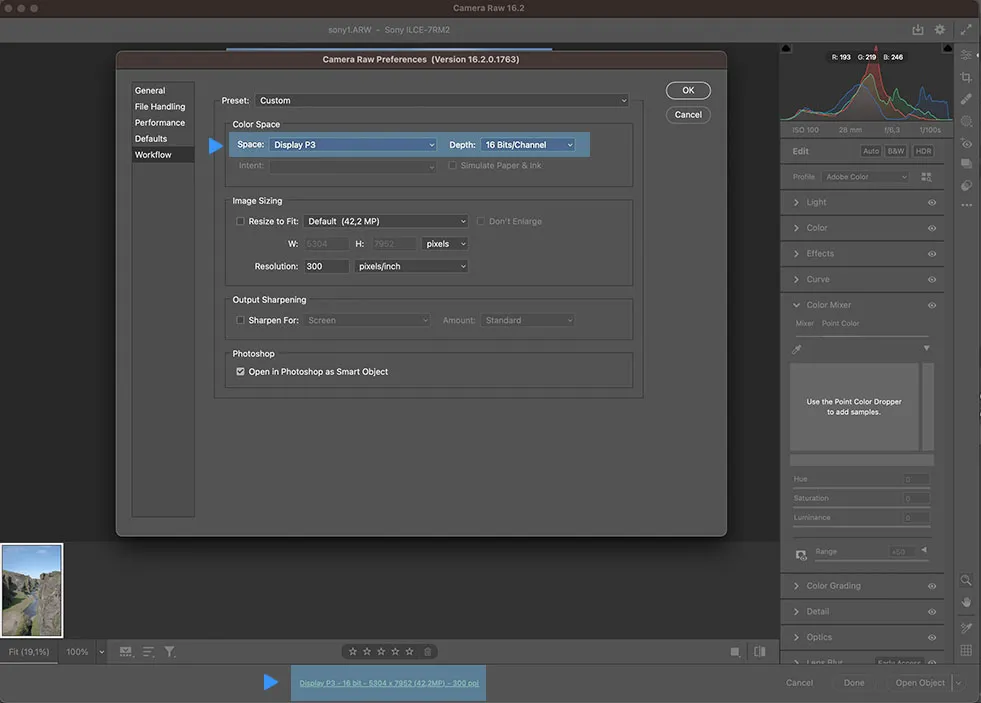
...and here's how to set Adobe Camera RAW to export in Display P3:
Display P3 Profile not available?
Download Display P3.icc and drop it into the color profile folder on your operating system:
macOS: Library/Application Support/Adobe/Color/Profiles/Recommended
Windows: Windows/System32/Color
2. Look Development in Color.io
- Open the image you exported from Lightroom in Color.io
- Set the Input Color Space to Display P3
- Develop your look with the tools and presets in Color.io.
- Export the final image when you're done.
- Optional: Learn how to export in Display P3 to Adobe Photoshop for color a managed round-trip between apps.
Create 3D LUTs for Adobe Lightroom.
For even more workflow flexibility and control over your images, Color.io allows you to export 3D LUTs as XMP Profiles for Adobe Lightroom and Camera RAW. These profiles allow you to embed the advanced color modeling and color management capabilities of Color.io into Lightroom and Camera RAW.
Color Managed Profiles: The Display P3 approach outlined above for image-based-workflows also applies to XMP Profiles and 3D LUTs!
1. How to export LUTs as XMP profiles for Lightroom and Camera RAW
Color.io comes with advanced color grading capabilities and can also export color adjustments directly into many desktop applications for photo and video editing. You can easily export the color grading effects from Color.io into Lightroom Classic, Lightroom CC and Adobe Camera RAW as XMP Profiles.
2. How to apply LUTs in Adobe Lightroom and Camera RAW
To apply 3D Lookup Tables (LUTs) to your images in Lightroom or Camera Raw, open the Profile Browser and find the XMP profile(s) you have created in the previous step. By default, Color.io saves any XMP profiles created with the app in the "Color.io" Category. You can always change this later.
Tip: Adobe Camera RAW requries XMP profiles to be in a .zip file. Just right-click on your downloaded XMP profile and compress it to ZIP before attempting to install.
With Color.io you can edit images and build 3D LUTs with a powerful online raw developer and analog film look designer for photographers and filmmakers. Craft stunning film color in record time that works for any camera, in any software and on any device, directly in your browser.